Securing your website with a proper X.509 certificate is essential to ensure encrypted connections (HTTPS), build user trust, and meet modern browser requirements. In this guide, we’ll walk through creating your own Certificate Authority (CA), issuing an end-entity (“server”) certificate, and testing it locally. We’ll also introduce XCA, a handy GUI tool for managing keys and certificates.
Why Run Your Own CA?
While you can purchase certificates from public CAs (DigiCert, etc.) or use a free public CA(Let’s Encrypt) a private CA is good for:
- Internal testing (development/staging).
- Lab environments where you control trust.
- Learning how X.509 certificates work under the hood.
Tip: For production public websites, always use a recognized CA. A private CA is not trusted by browsers by default.
Prerequisites
- OpenSSL installed (most Linux/macOS distributions include it; Windows users can use WSL or Git Bash).
- Node.js if you want to test via
http-server. - XCA: a GUI to manage keys, CSRs, and certificates. Download from hohnstaedt.de/xca.
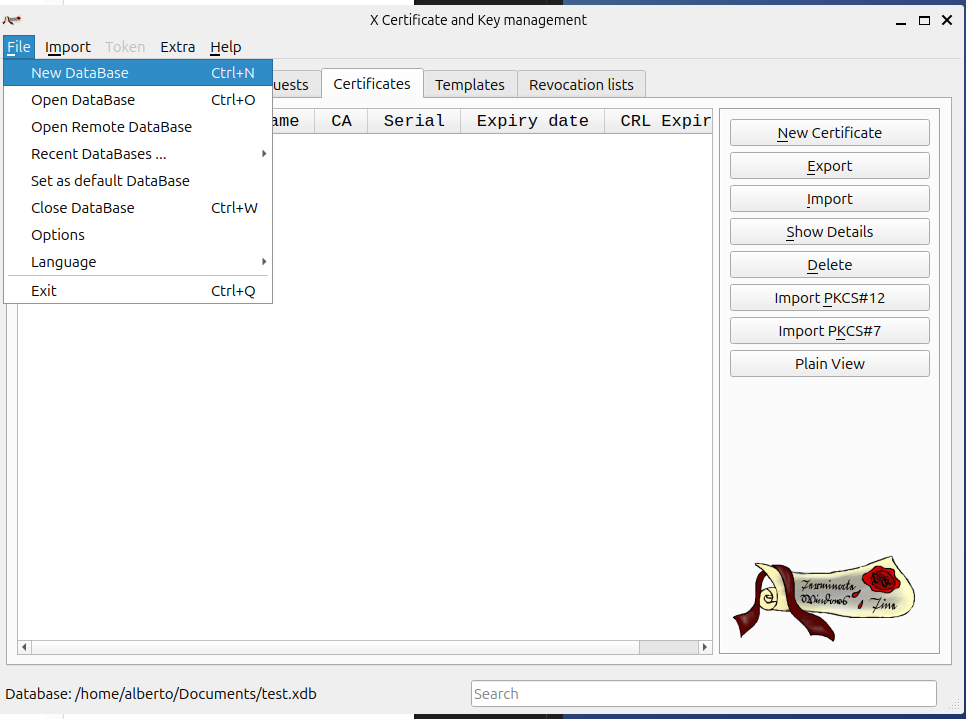
1. Create a New XCA Database
- Launch XCA.
- File → New Database…
- In the New Database dialog (shown above):
- Database name: e.g.
myCA.xdb - File path: choose a secure folder.
- (Optionally) enable Encrypt database and Store passwords in database for extra safety.
- Database name: e.g.
- Click OK and set a password if prompted.
- You’ll now see an empty database with tabs: Certificates, Revocation Lists, Trust & Templates, etc.
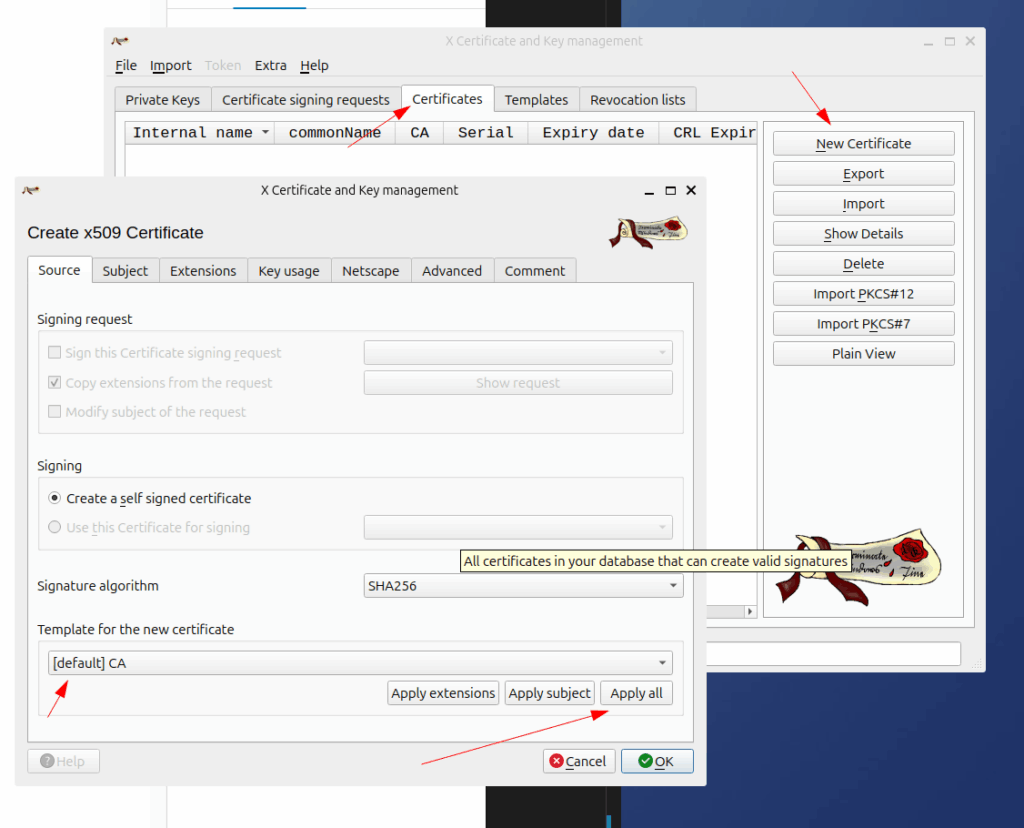
2. Generate the Root CA Key and Certificate
Create a new certificate, inside the certificates tab
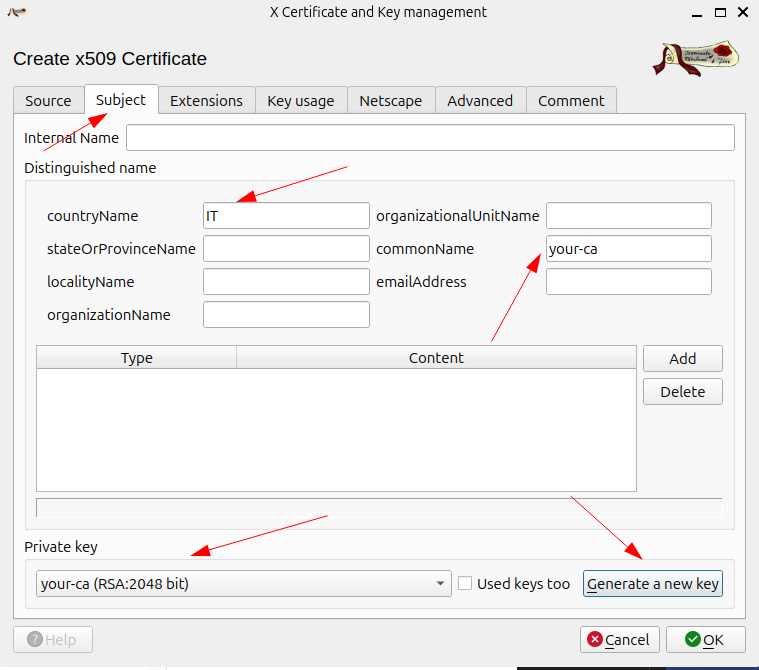
configure the subject
then configure the extensions
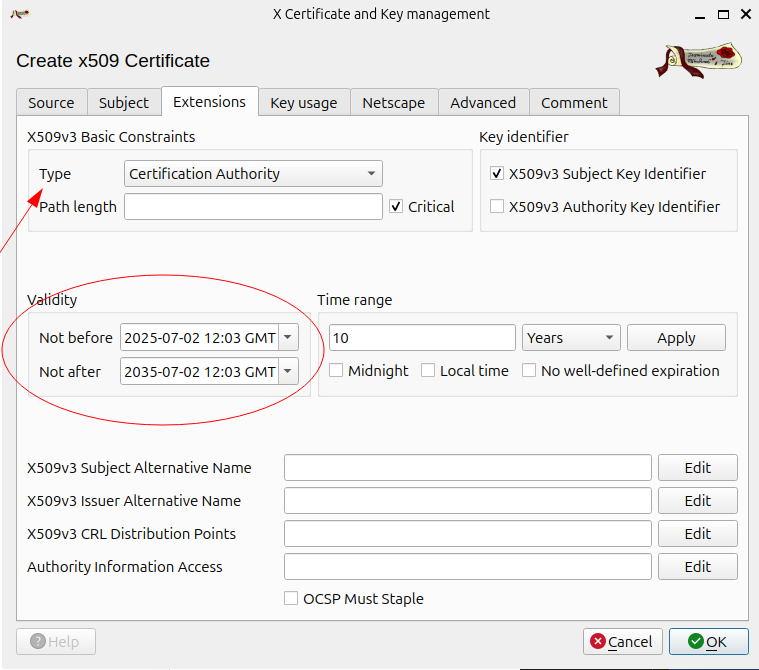
Finally press OK
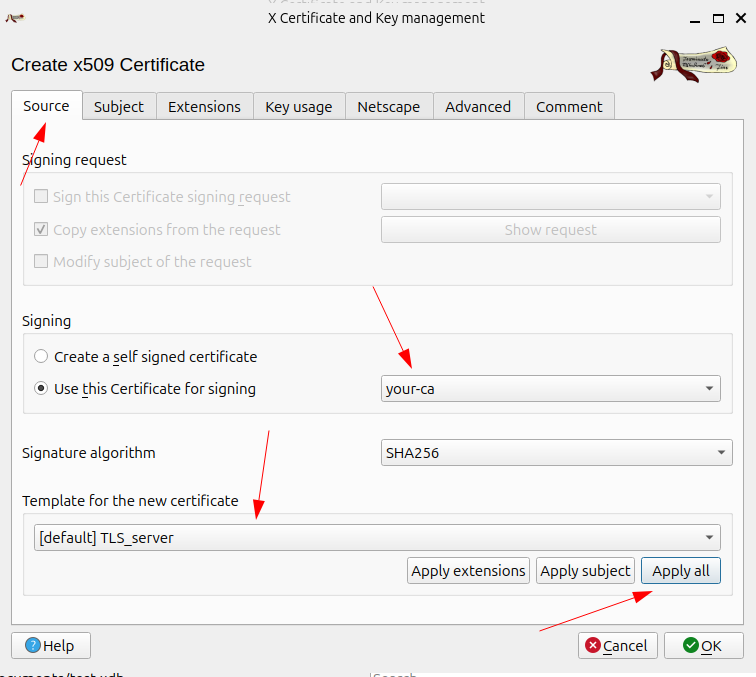
3. Create an End-Entity (Server) Certificate
Then create a new certificate for the end entity (such as the backend server)
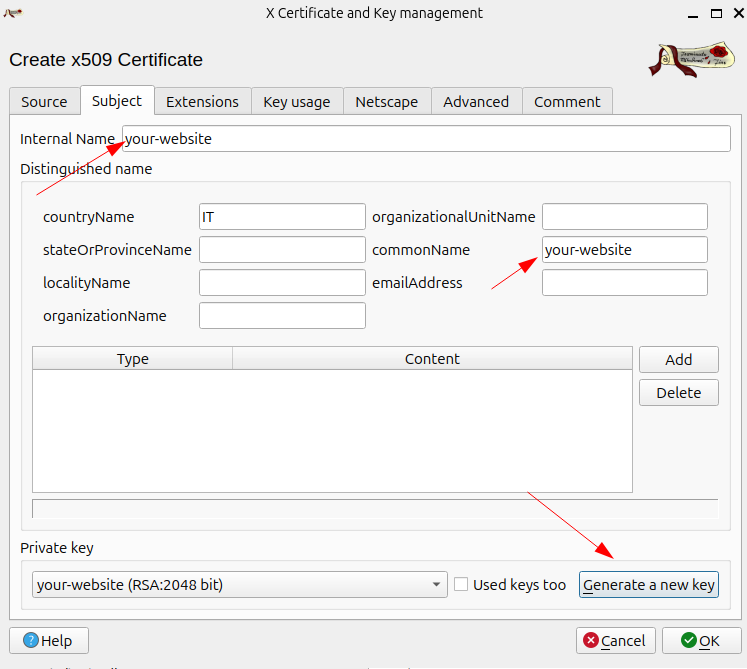
then configure the subject
then configure the extensions with subject alternative name (ex: dns, ip,…)
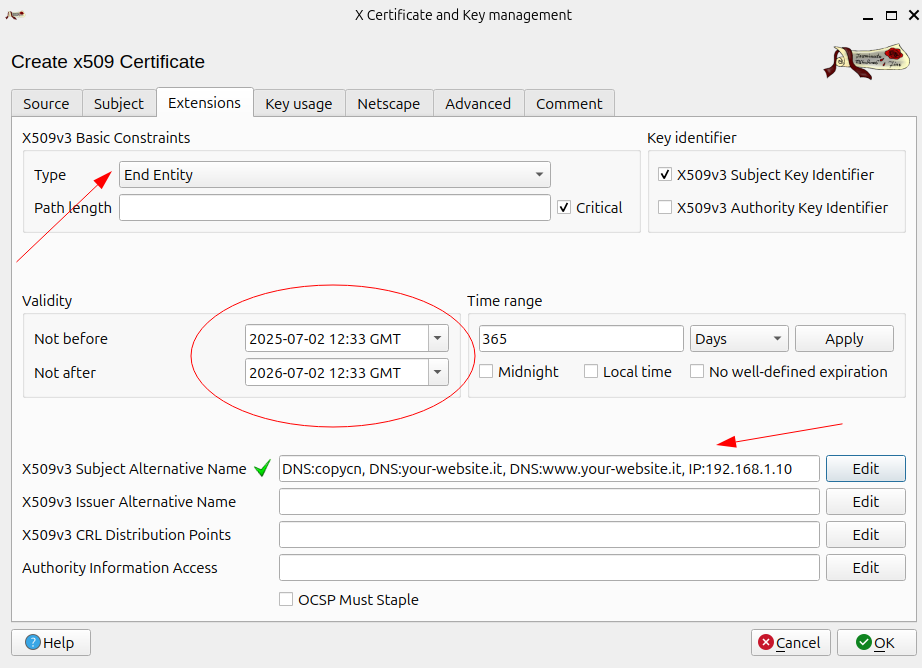
check the key usage
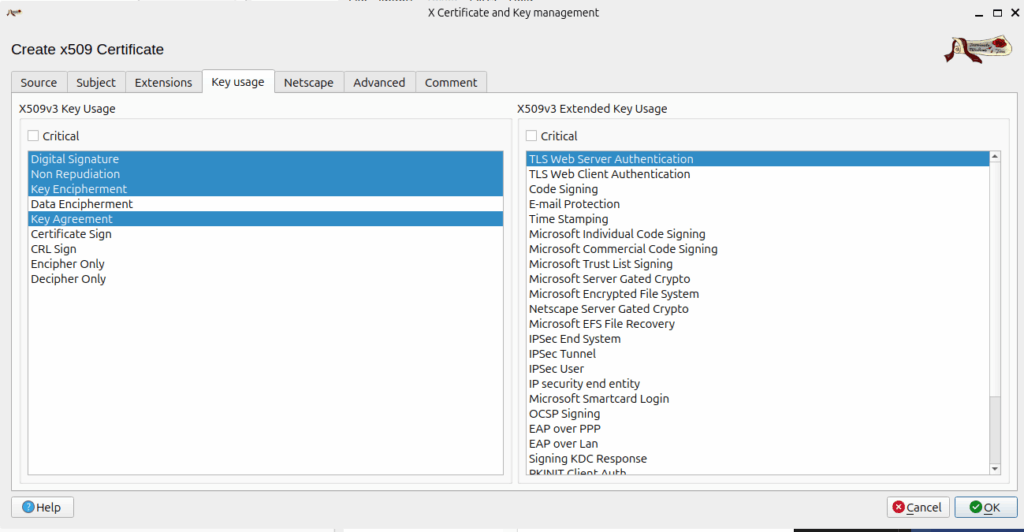
then press OK
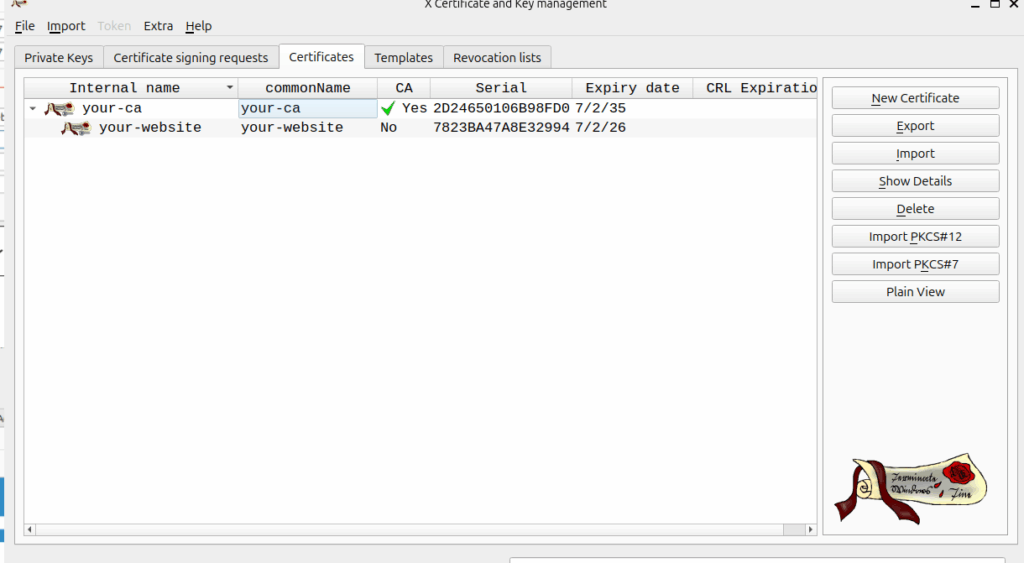
Now should look like this
4. Export Certificates & Keys
- export in PEM format the certificates (CA and end-user)

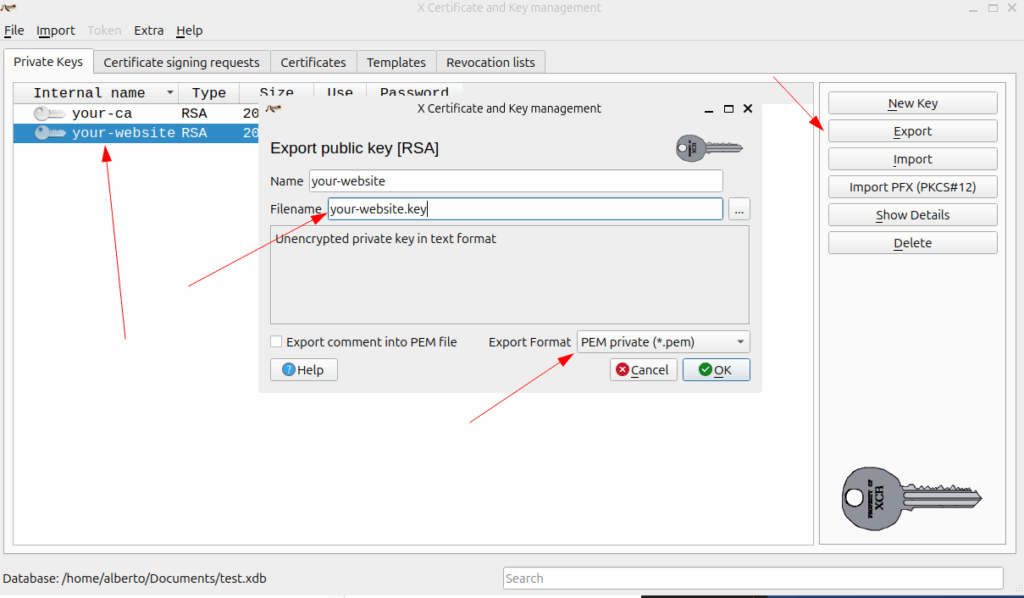
- export in PEM format the private key of the end-user certificate. Change .pem into .key to mark that is a private key and secure properly (chmod 400 your-website.key)
5. Trusting Your CA & Testing
The connection will now be trusted because your browser recognizes your Root CA.
Install your-ca.crt file into your browser or OS as a Trusted Root CA.
Serve your site locally or on a LAN. For example, with Node’s HTTP-Server:
# Create a dir
mkdir your-website
cd your-website
mkdir html
mkdir cert
# Create an html file called index.html
echo -e "<html lang=\"en\">\n<head>\n <meta charset=\"UTF-8\">\n <title>Basic Test</title>\n</head>\n<body>\n It works\n</body>\n</html>" > html/index.html
# Copy cert and private key
cp <outputdir>/your-website.crt cert/your-website.crt
cp <outputdir>/your-website.key cert/your-website.key
# run http-server
# this is just a test, DO NOT USE IN PROD
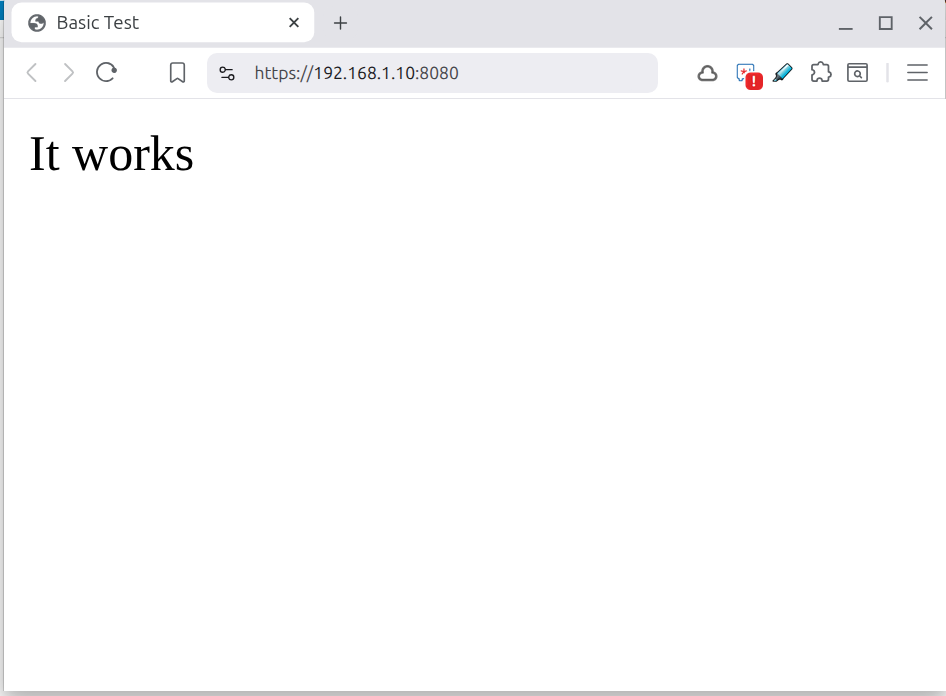
npx http-server html -S -C cert/your-website.crt -K cert/your-website.keyThe output should be a secure website.
You can use IP or DNS as you specified inside the “subject alternative name”